Subhilt par Lucas Burnley

Aspect technique du couteau, réalisation, etc.

Subhilt par Lucas Burnley

Messagepar Moonlight » 13 Mar 2008 14:00

Image

ça vous tente de voir ça?
Moonlight
 
Messages: 7275
Inscrit le: 01 Nov 2006 11:07

Messagepar Crocuta » 13 Mar 2008 14:00

HAÏ!
Avatar de l’utilisateur
Crocuta
Hyène Bien Fou
 
Messages: 4841
Inscrit le: 30 Jan 2008 17:11
Localisation: Aveyrrron

Messagepar polebleu » 13 Mar 2008 14:01

fais peter
les personnes sont là pour être aimées, les choses pour être utilisées
dans la vie on fait souvent l'inverse ( olmo)
Avatar de l’utilisateur
polebleu
Refus d'énorme
 
Messages: 11698
Inscrit le: 02 Juil 2007 11:29

Messagepar Moonlight » 13 Mar 2008 14:02

gni? :non:
Moonlight
 
Messages: 7275
Inscrit le: 01 Nov 2006 11:07

Messagepar Crocuta » 13 Mar 2008 14:03

Voui, ça nous zintéresse, fais péter les photos, rouya :D
Avatar de l’utilisateur
Crocuta
Hyène Bien Fou
 
Messages: 4841
Inscrit le: 30 Jan 2008 17:11
Localisation: Aveyrrron

Messagepar polebleu » 13 Mar 2008 14:03

sakeutdein comme on dit dans le ch'nord
les personnes sont là pour être aimées, les choses pour être utilisées
dans la vie on fait souvent l'inverse ( olmo)
Avatar de l’utilisateur
polebleu
Refus d'énorme
 
Messages: 11698
Inscrit le: 02 Juil 2007 11:29

Messagepar Moonlight » 13 Mar 2008 14:07

Image
Image
Image

Image

Image

My reference lines are layed out now I just have to mark the edge and I can get grinding.

Image

Laying out the edge,
Image

Image

Here I'm taking the edge down to the scribed lines, in preparation for grinding the bevel's

Image

Image

Image

I ground the top edge on an 8 inch wheel, and will do the bottom on the 12 inch in the picture. Halfway there

Image

I love this wheel, it's one of Berties from SA I heard that they are not being made anymore, anybody know for sure?
Image

Image

I think I'm going to taper the tang on this as well, once that is done I can move on to the hard stuff. I've never fit a guard from the front so I'll probably have to go pretty slow with my coachwork.
I've got some neat stuff planned for this one, but I want to get all the major components made so I can plan my time for any embellishments a little more accurately.
Moonlight
 
Messages: 7275
Inscrit le: 01 Nov 2006 11:07

Messagepar stancaiman » 13 Mar 2008 14:11

c'est un yam 650 XS derrière ? :bave:
Avatar de l’utilisateur
stancaiman
Quantum of Solex
 
Messages: 68624
Inscrit le: 31 Oct 2006 19:21
Localisation: Paris

Messagepar Moonlight » 13 Mar 2008 14:13

Here is my temporary machining center..
Image


getting my vise set up, this mill is a real beast I tell ya, that vise weighs at least two pounds.
Image


After I saw Allan's new Voodoo that that he obviously had custom made, I decided that I really needed to step it up, luckily I got a box from Spencer this Am, with just the ticket, I threw in my voodoo priest ear tusks and got to work.…

Image

What? it's hot you say? I hadn't noticed..
Image


Not wanting to go to hard on Allen I decided to do a little mill work.
The only brass guard stock I had was .5 so I took it down to .350
I'll probably end up at around .325 but I wanted to leave a little room for clean up.
Image

Ooop's...Tee..hee...I just can't seem to help myself.….

Image

After I got my guard stock down to size I rough cut it out on the band saw.

Image

The blade in it's current state with the guard blanks.

Image

An then back to the mill to true up the edges...

Image

Spot drilling my hole locations.

Image

Hey nice shot voodoo doll Allen.
Image


I realized yesterday that I was out of brass Corby bolts and had to borrow a few from a friend, I did'nt have the right size pilot for my counterbore so I decided to chuck a larger size up in my JK lathe and turn it down. Gotta love a lathe with a grinding attachment.…
Image


I'm getting ready to flatten the blade, and taper the tang, after that I will start working on the guard fitting.

Image
Moonlight
 
Messages: 7275
Inscrit le: 01 Nov 2006 11:07

Messagepar bulbo » 13 Mar 2008 14:16

Trop facile, moi aussi si j'avais mon bras droit fait par PH je ferais de super truc comme ça :marteau:
Fin d'activité sur ce forum .. merci stan .. ça me fera des économies
Avatar de l’utilisateur
bulbo
Le Hobbut
 
Messages: 1267
Inscrit le: 03 Déc 2007 18:21

Messagepar Moonlight » 13 Mar 2008 14:18

The steel came slightly over size so I took it over to the surface grinder and brought it down to .187
Image


I couldn't find my radius guide so I made one out of a piece of scrap brass. In this pic the shoulders for the guard have already been filed in and I'm getting ready to radius the spine.

Image
Image


Draw filing the spine.
I went pretty slow through this part to make sure I got it right, I'm really happy with the way it turned out. I definitely have a new found respect for the fellas who fit the majority of their guards in in this fashion, I was walking on egg shells the whole time.
As I filed I kept marking the spine with layout fluid to see where I was removing the most metal, about halfway through I had a serious DUH.. moment and realized that if I scraped the spine with my guide, I could see the high spots.
Image


Once the filing was done I shoeshined both sides up to 400g.
Image


Here's the end result, we'll see how well it worked tomorrow, when I get my guards slotted.
Image


After that I decide to start tapering the tang.
Just like on the blade I grind a small bevel to let me know how far to grind in.
Image


And then I work my way up towards the guard.
Image

I only grind the hollows before heat treat, afterwords I will go to the flat platen and bring it all in. I find I get a lot less warping that way.
I grind just shy of my reference lines, so it's easier to keep centered.

Image

Counter sinking all the holes.

Image

Image
Moonlight
 
Messages: 7275
Inscrit le: 01 Nov 2006 11:07

Messagepar Moonlight » 13 Mar 2008 14:20

Image

pour faire des beaux couteaux, il faut vivre ce métier à plein temps :D
Moonlight
 
Messages: 7275
Inscrit le: 01 Nov 2006 11:07

Messagepar Moonlight » 13 Mar 2008 14:24

Image

I really wanted to get my guards fit up, so that was where I started.

Image

This is my super custom NDRO, this thing will hold like a 16th no problem

Image

My High PSI chip relocator system came in handy today.

Image

One down, feelin good now.

Image

Time get started on the slot for the sub hilt,

Image

Filing in the radius, I had fun on this one and it went pretty quick.

Image

Drilling the hole for my pins.
Image


Glamor shot.. OooH Rugged.
Image
Image
Dernière édition par Moonlight le 13 Mar 2008 14:48, édité 2 fois au total.
Moonlight
 
Messages: 7275
Inscrit le: 01 Nov 2006 11:07

Messagepar Moonlight » 13 Mar 2008 14:27

I started rough shaping the guards this afternoon,

Image

Begining the radius on the inside of the guards, I got stuck here for a while and alsmost had a pretty bad screw up..

Image

I'm running pretty short on time now, but like I said earlier in the thread I want to build something awesome or crash and burn.. After all it's not everday somebody gets to build off against Allen right?


So I started hand fullering the blade.
As long as I can get the blade into heat treat today I should have enough time..

Image

I have one side pretty much done, I'm going to get the other side roughed in and then clean them both up so that I can keep them as simetrical from sise to side as possible..

Image
It's finally starting to look like a knife now..
Image
Moonlight
 
Messages: 7275
Inscrit le: 01 Nov 2006 11:07

Messagepar Moonlight » 13 Mar 2008 14:41

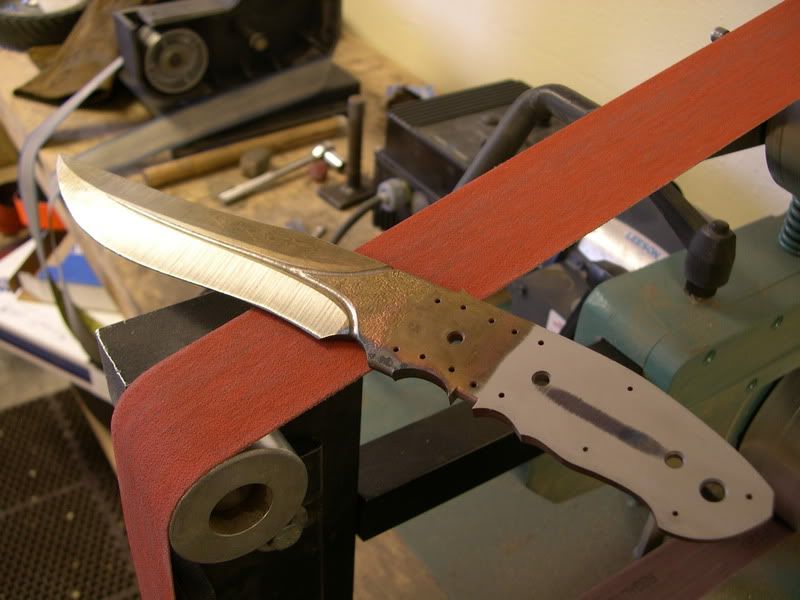
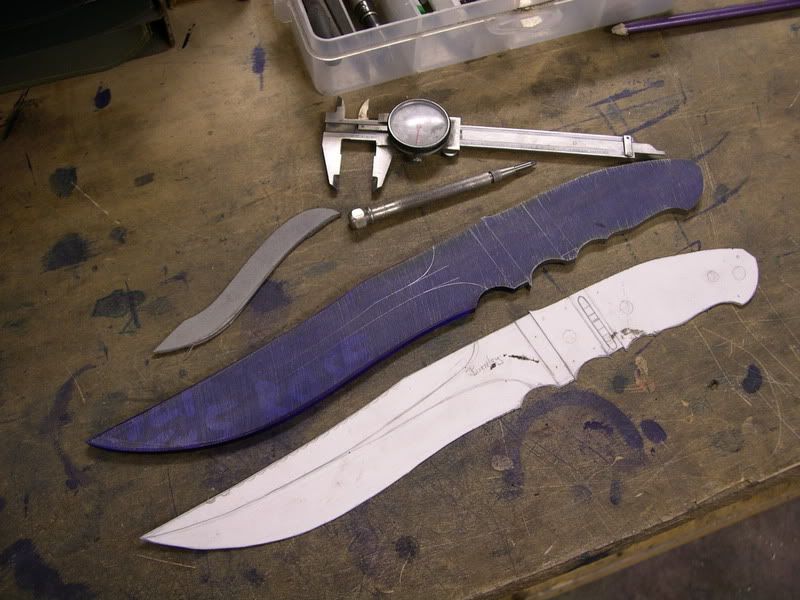
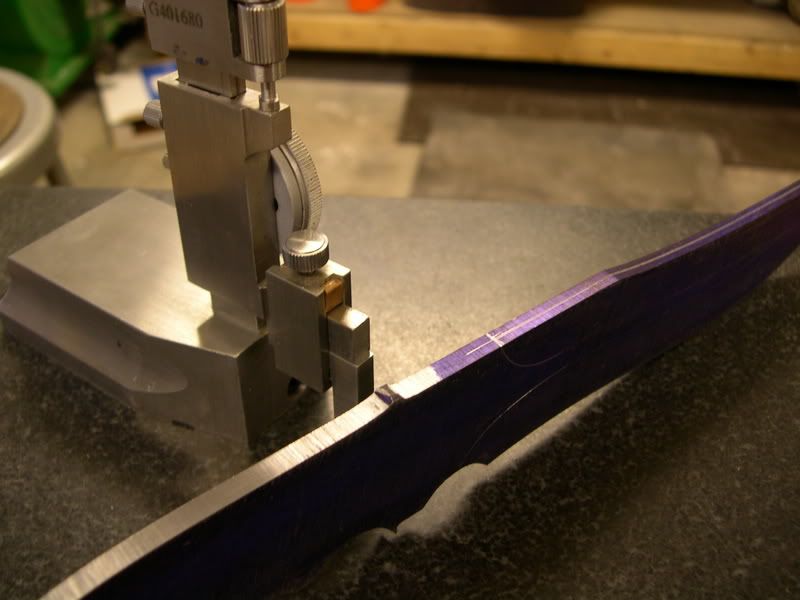
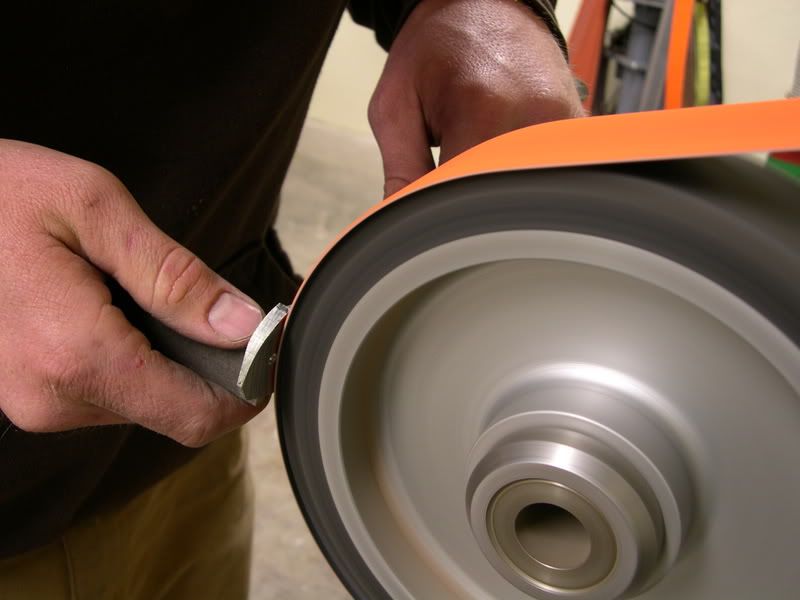
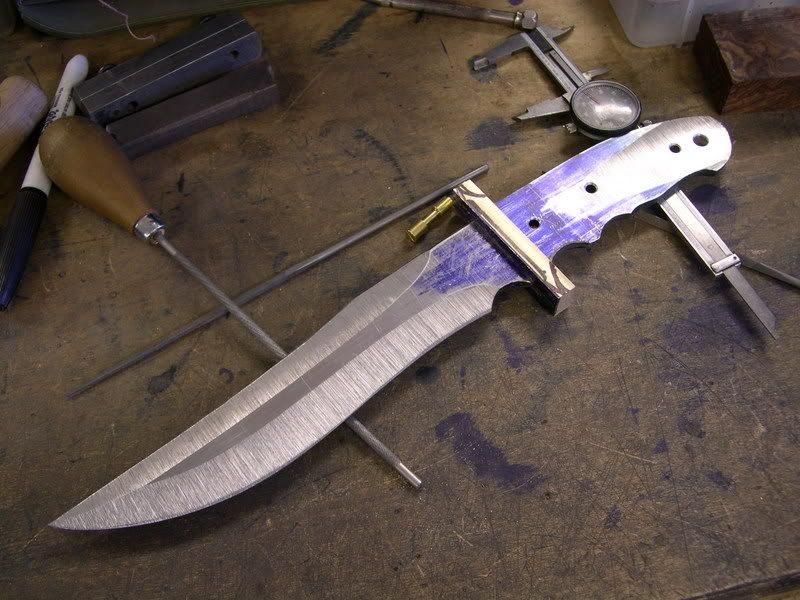
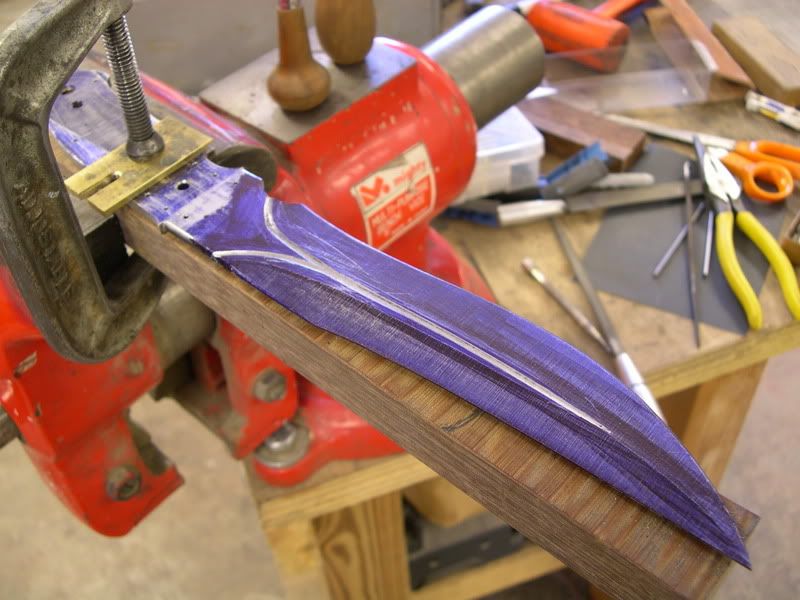
Top side of the fuller,
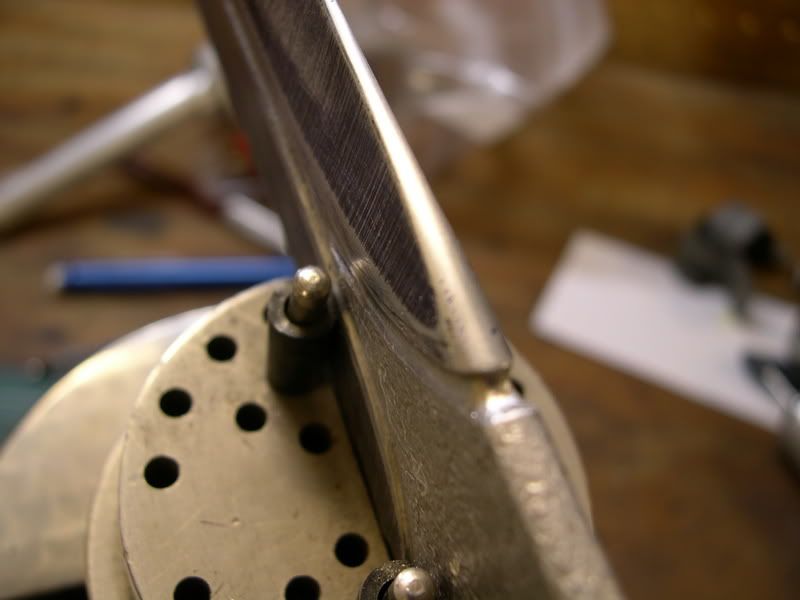
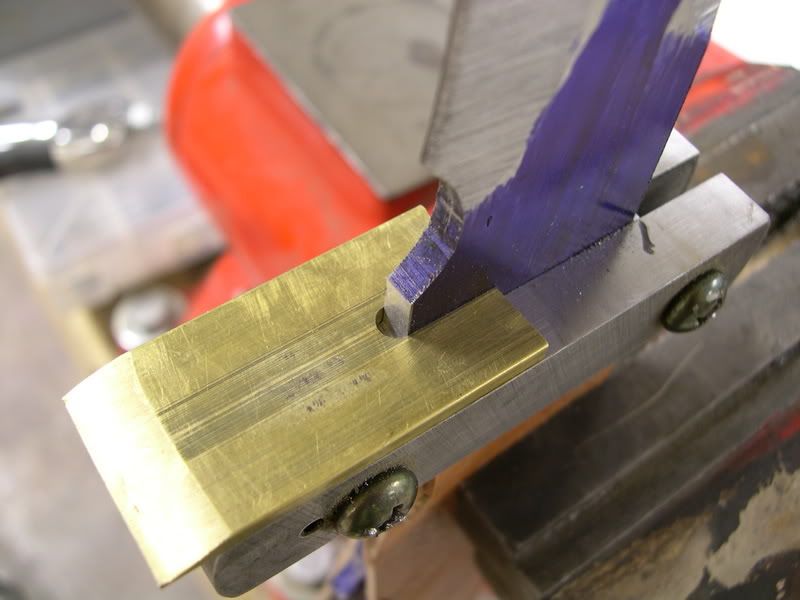
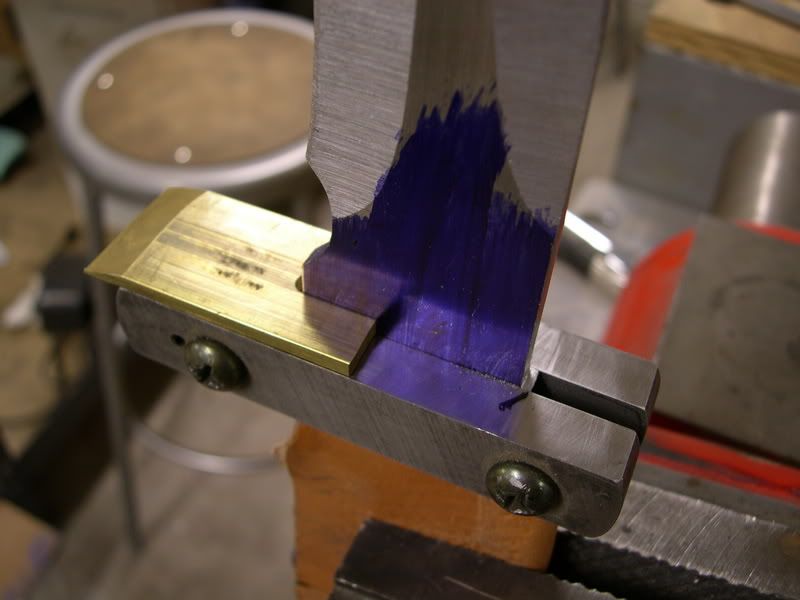
Image

Choil area,

Image

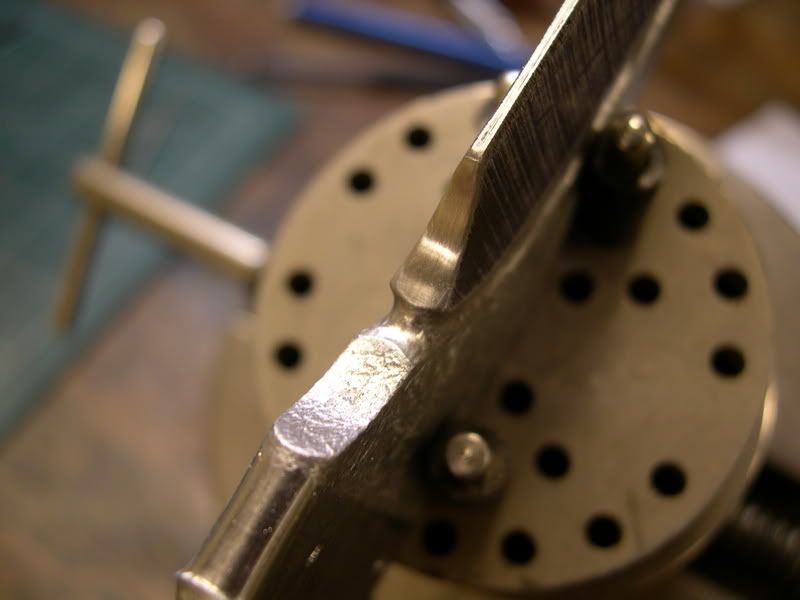
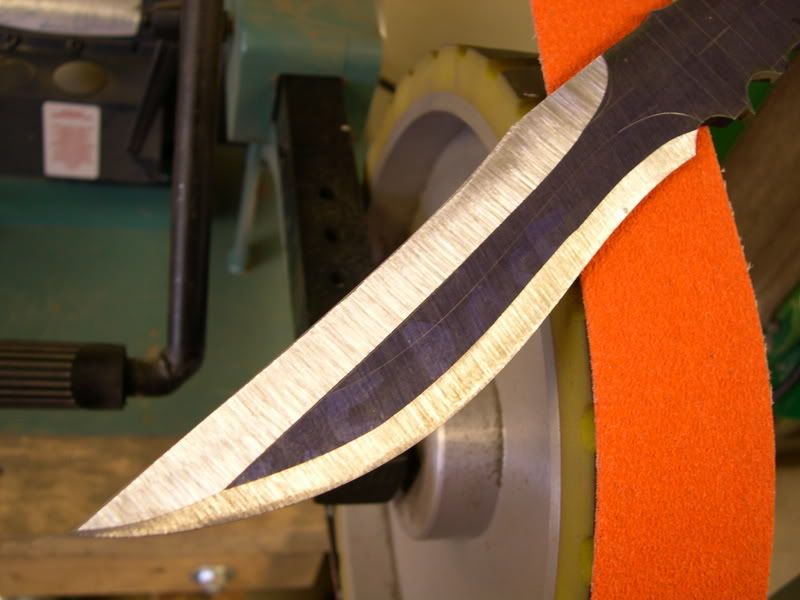
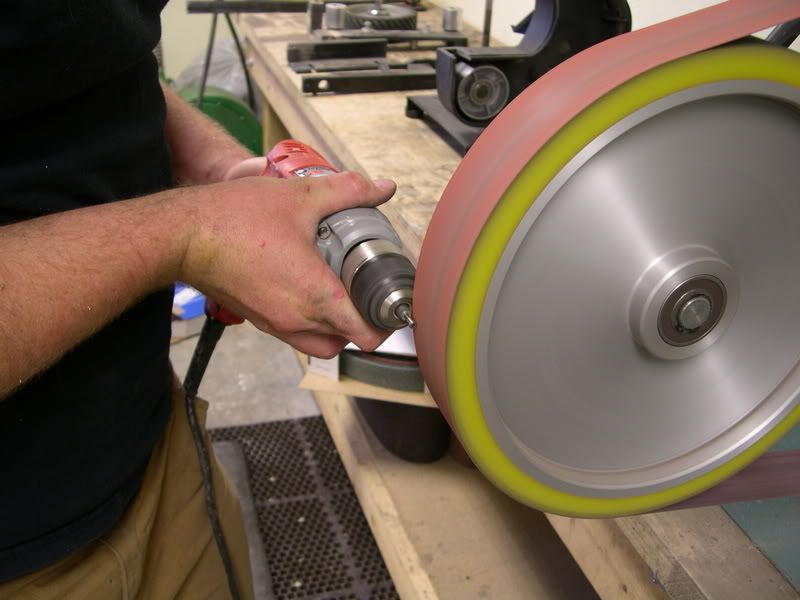
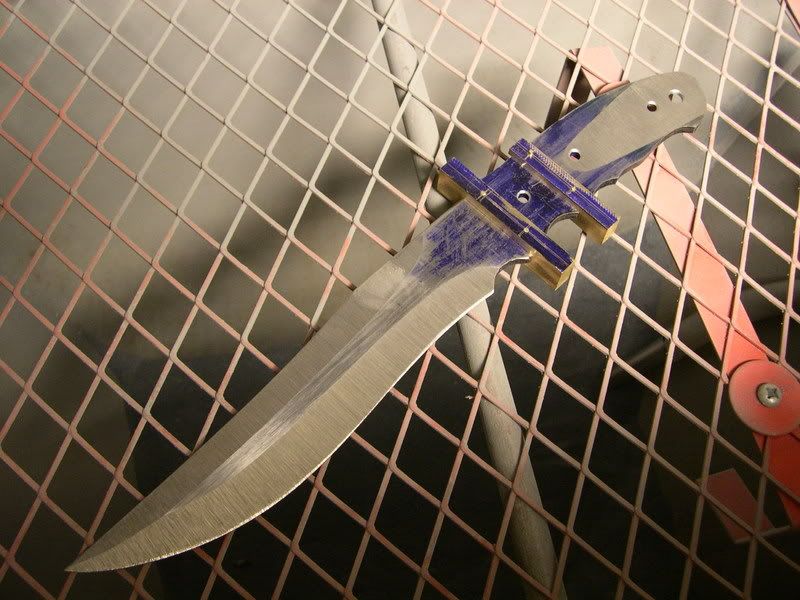
Side view of the completed texturing.. After heat treat I'll bring the grinds all the way to the fuller.

Image


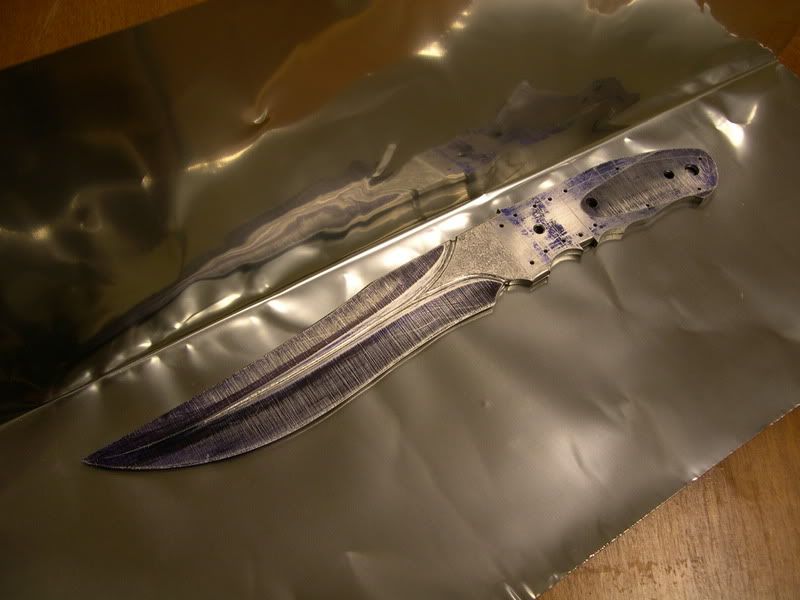
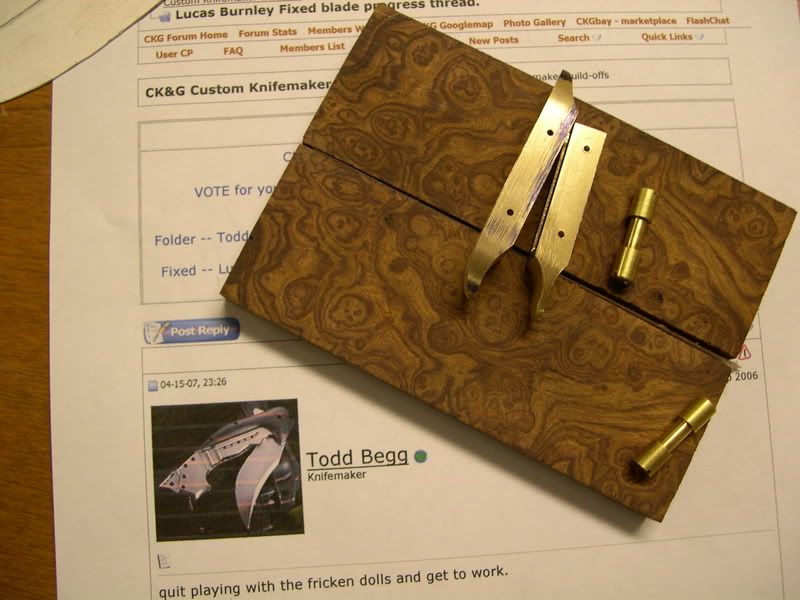
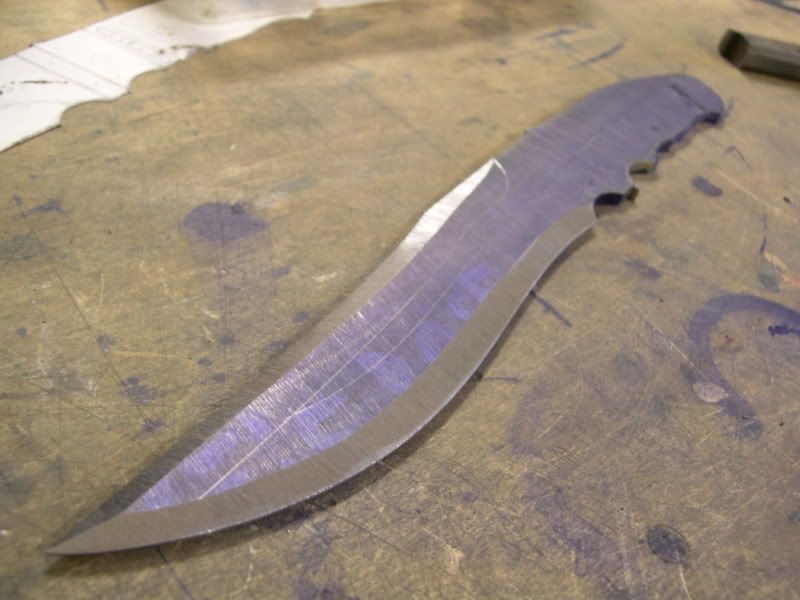
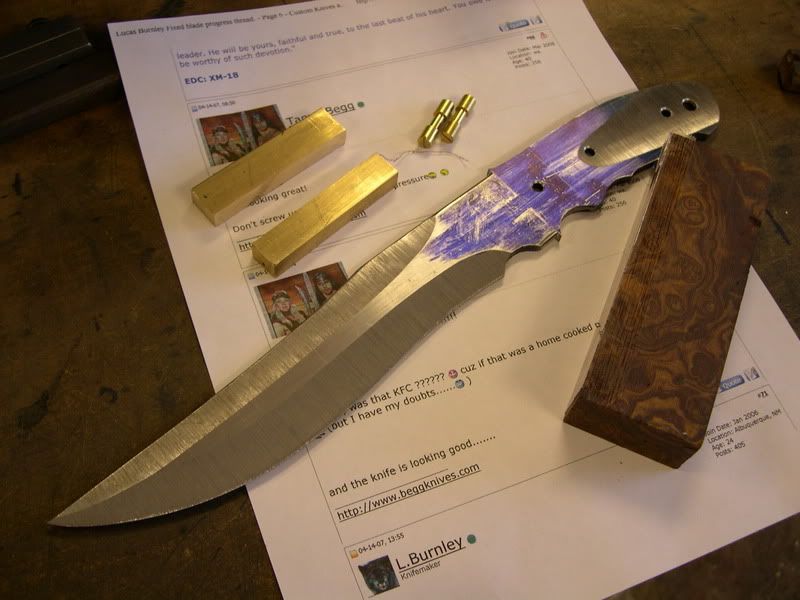
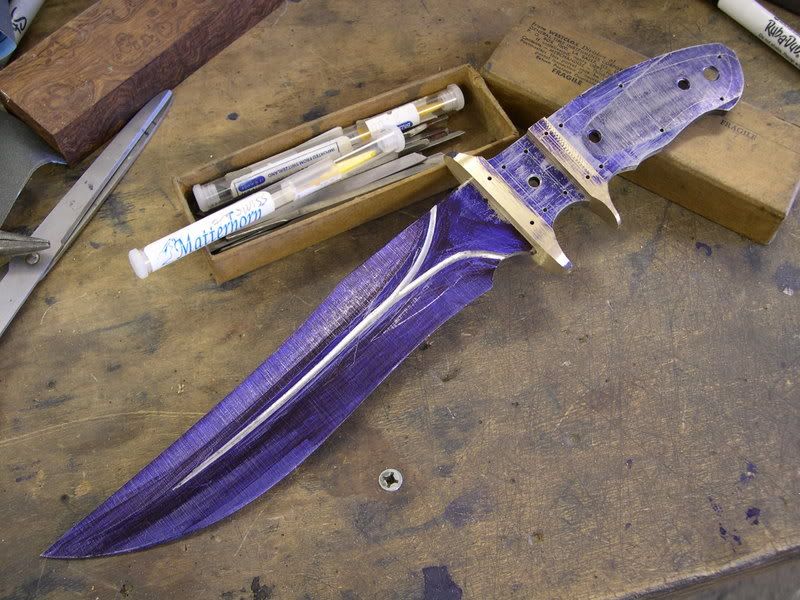
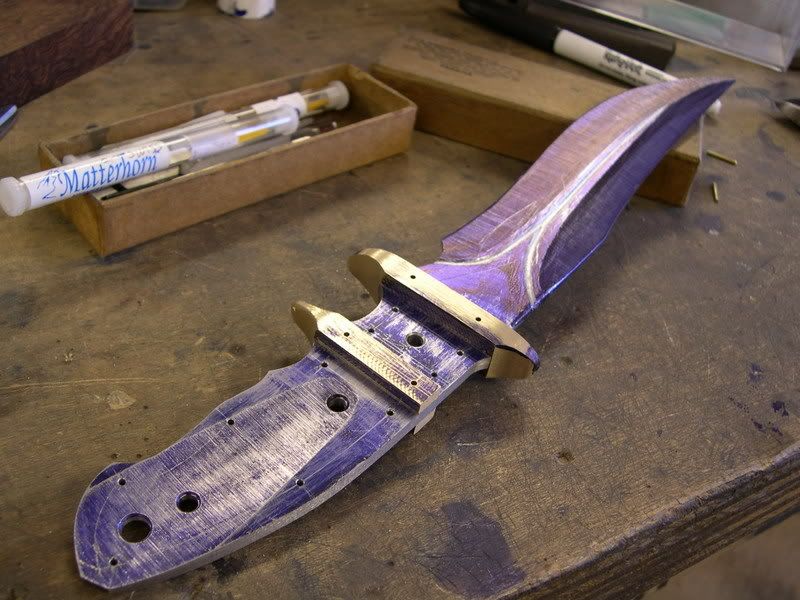
Finally ready for Heat treat,

Image

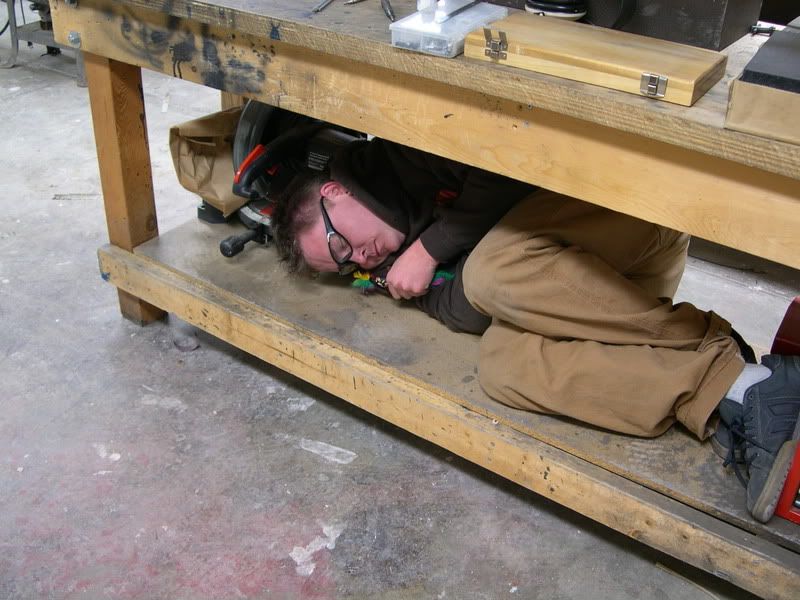
I knew I should have kept the instructions...

Image

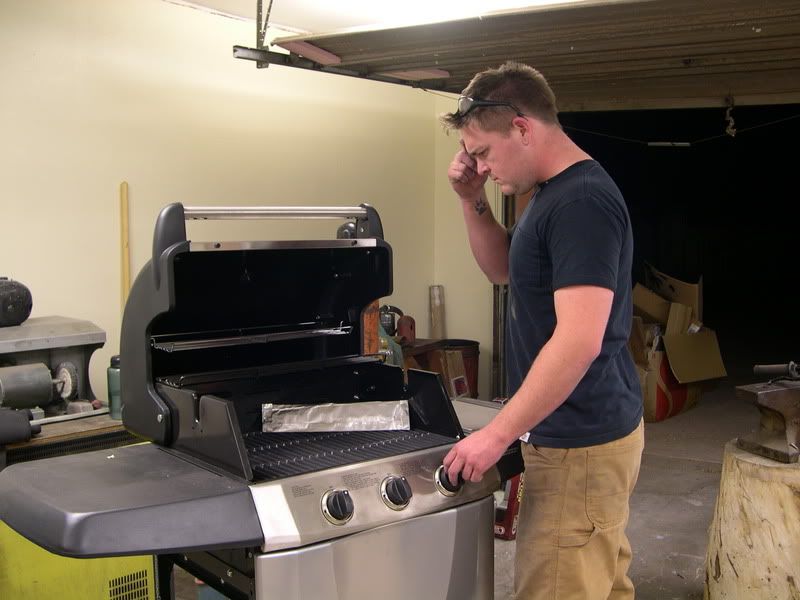
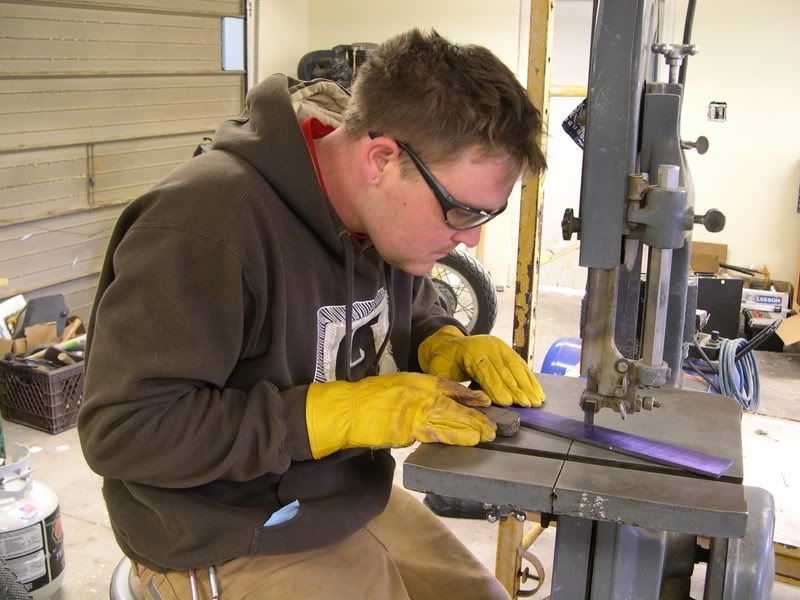
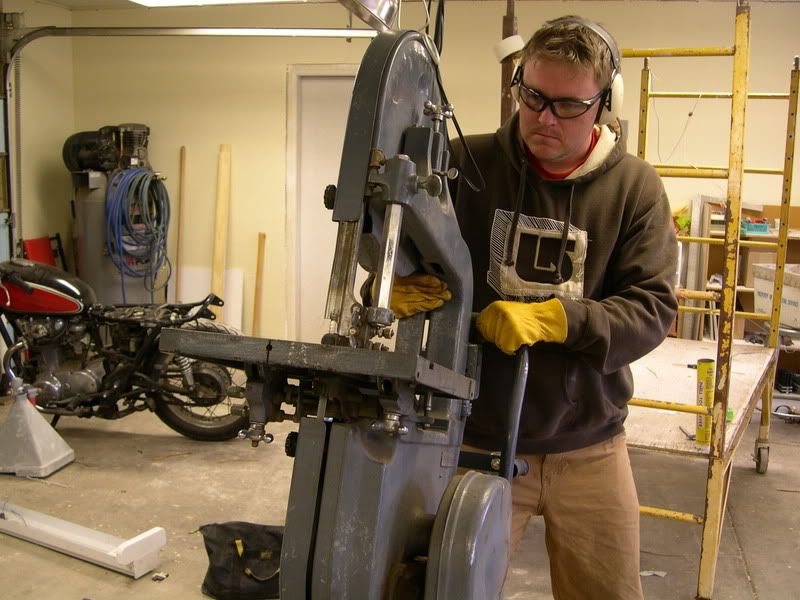
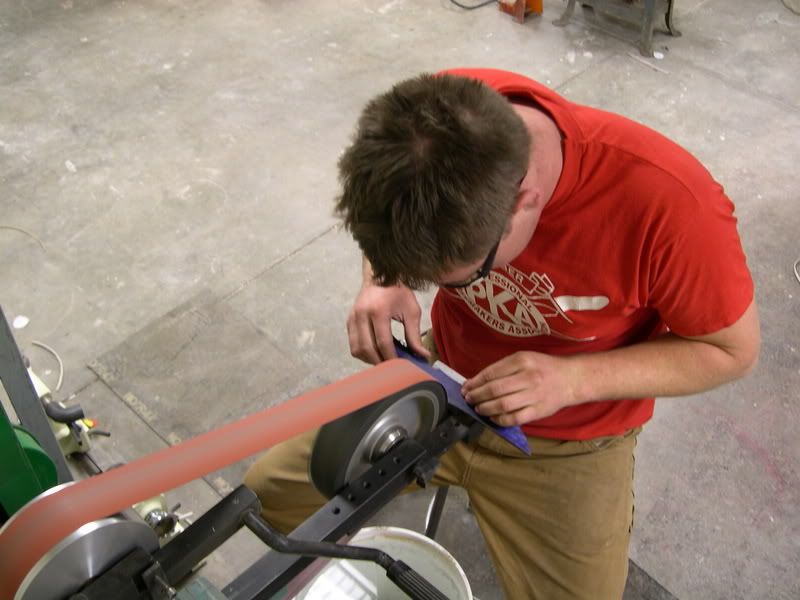
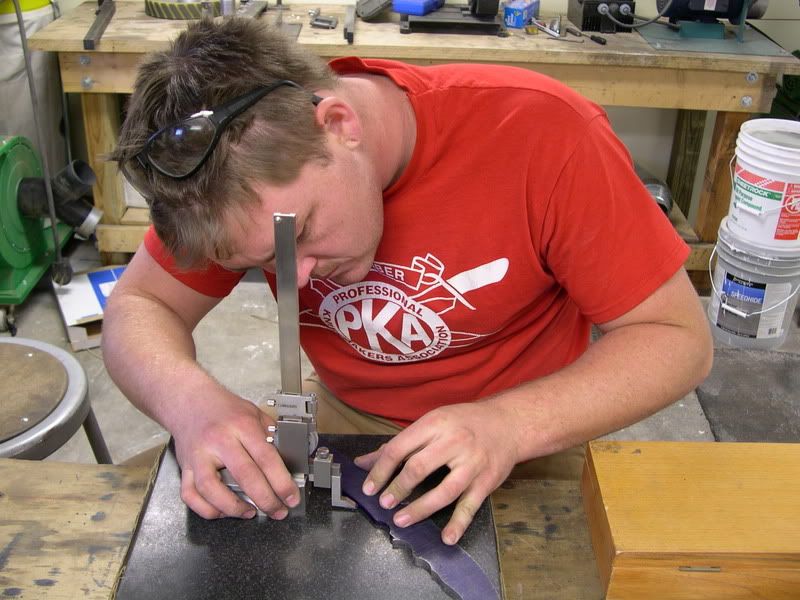
Just kidding, Here we go. Photogenic fellas aint we!

Image


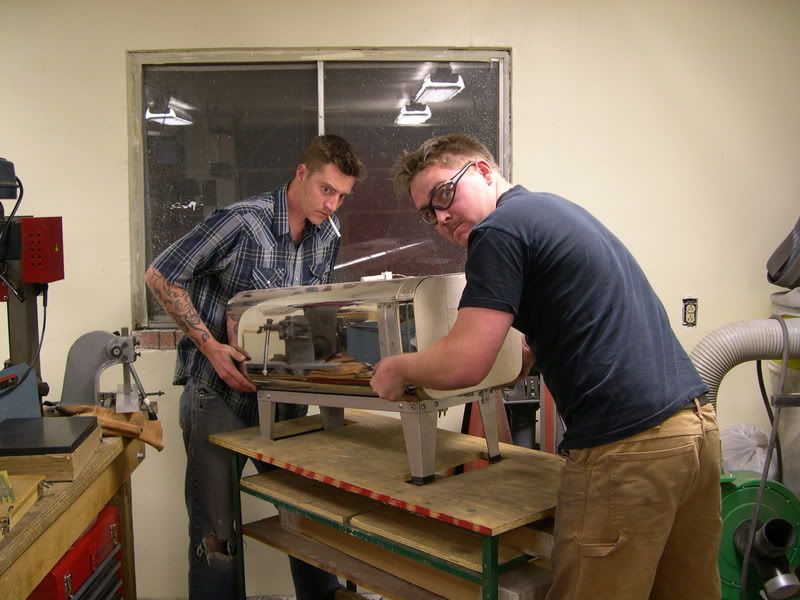
Back to the shop, the knife is in the oven as we speak, and I'm startin in on the leather.
Image

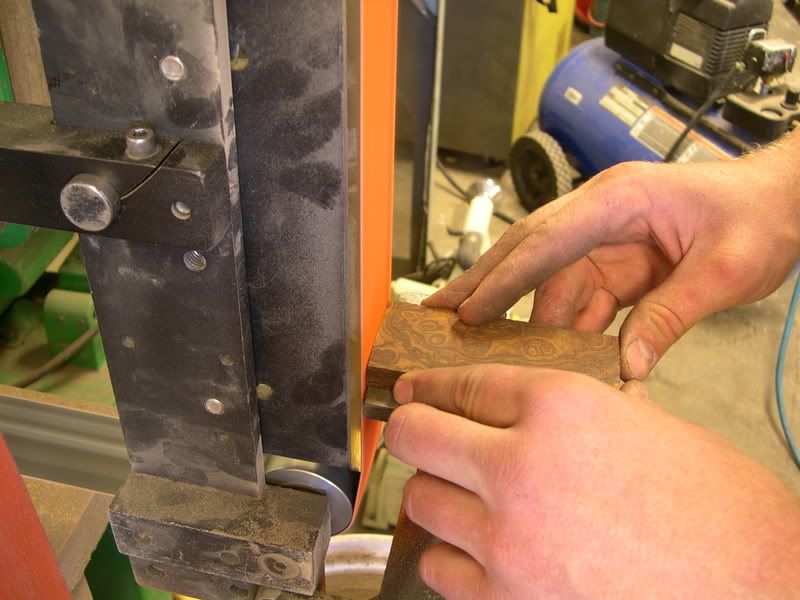
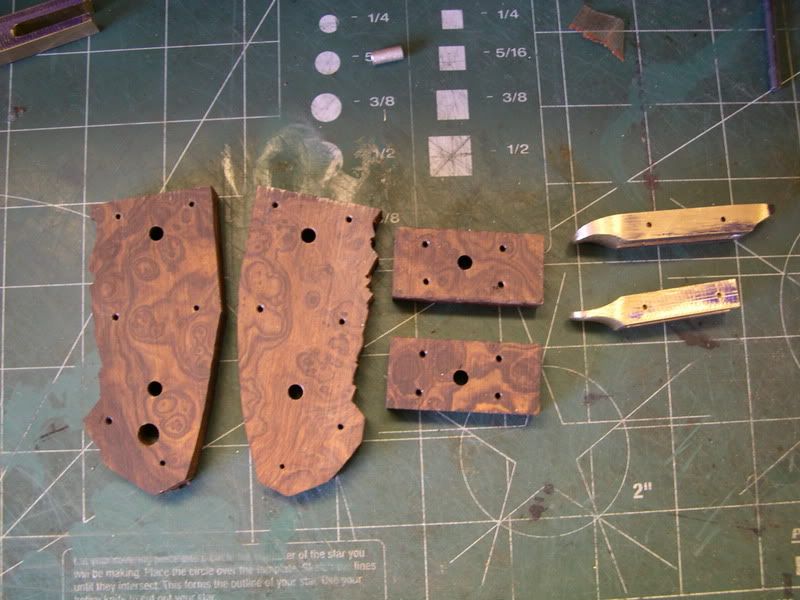
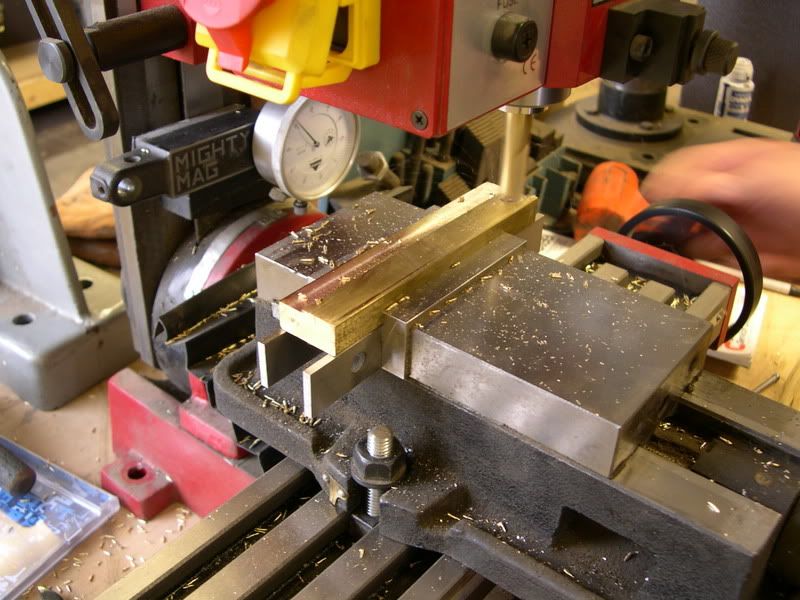
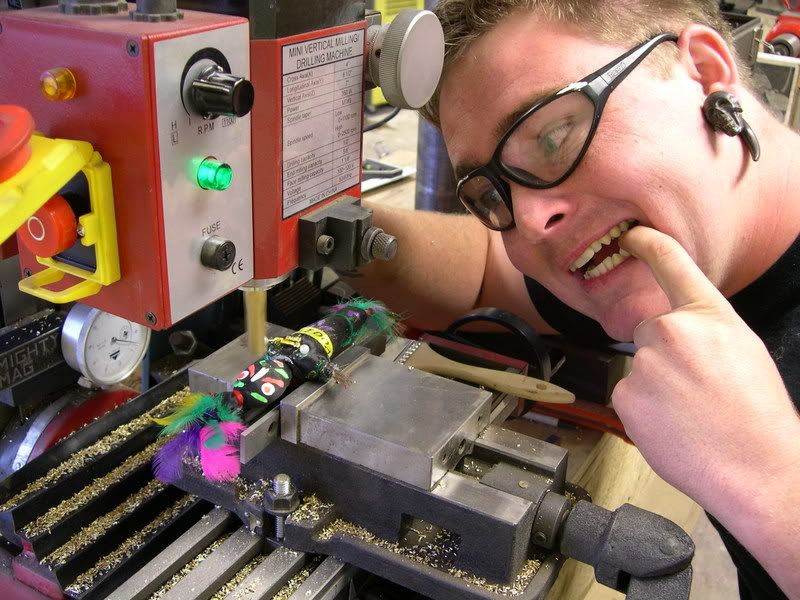
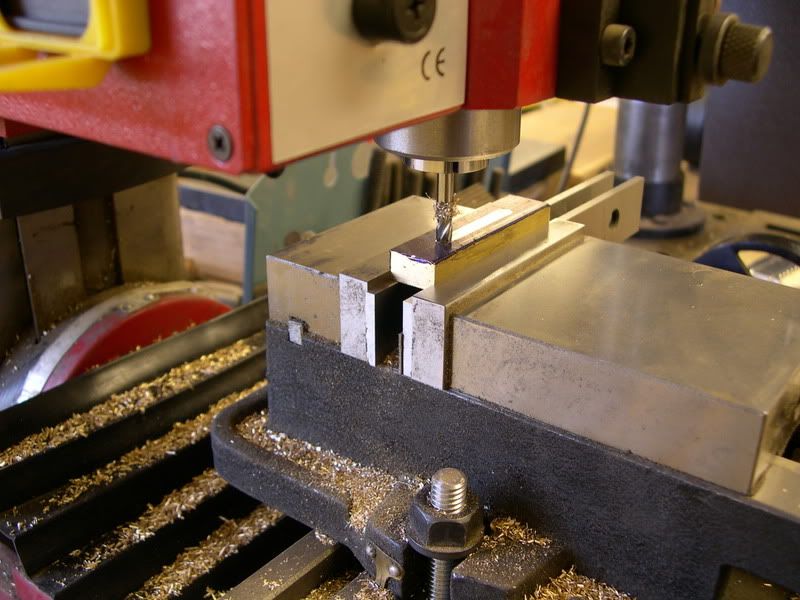
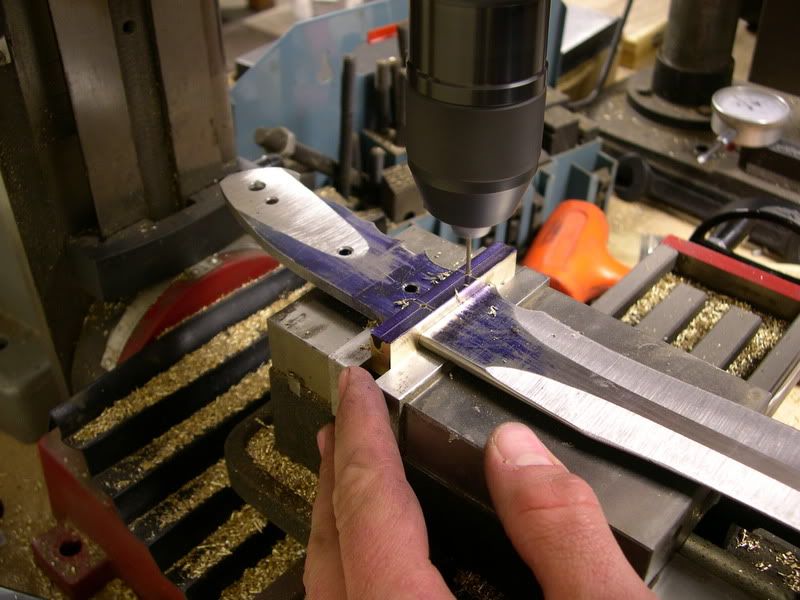
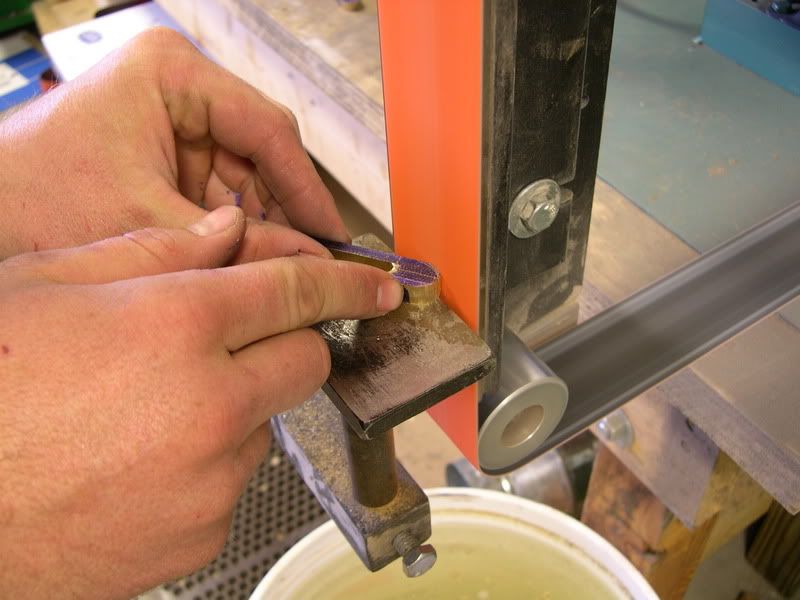
Started out this moring by milling my handle inserts.
Image

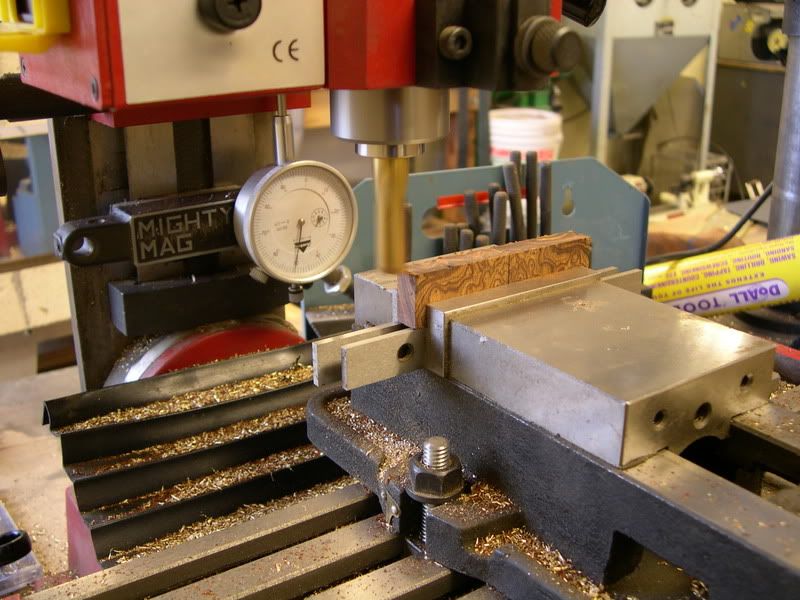
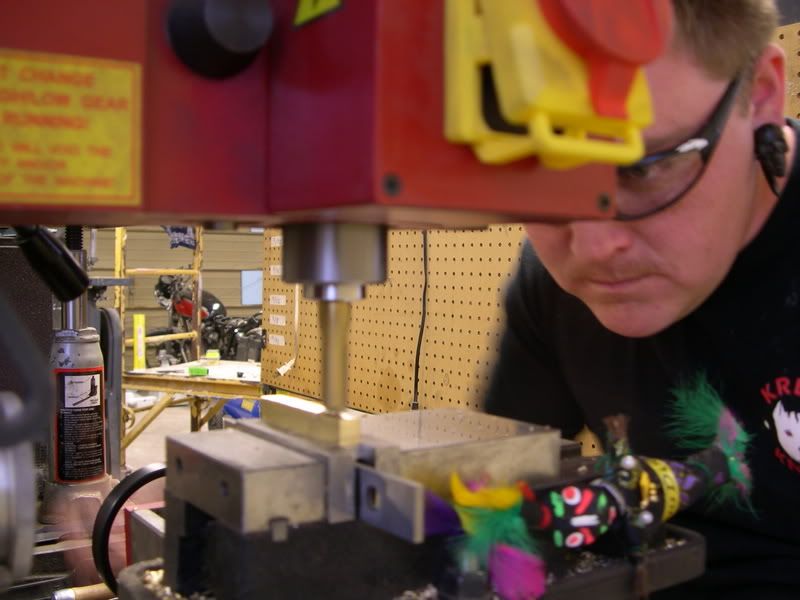
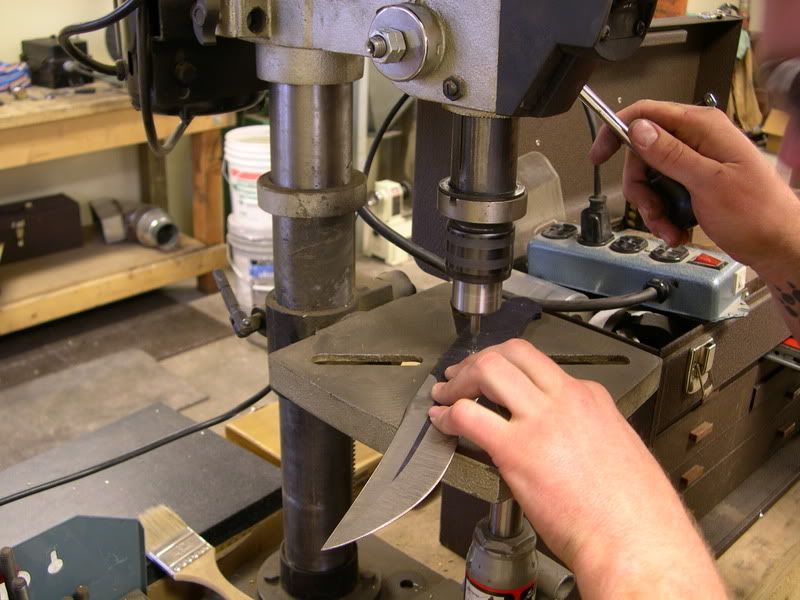
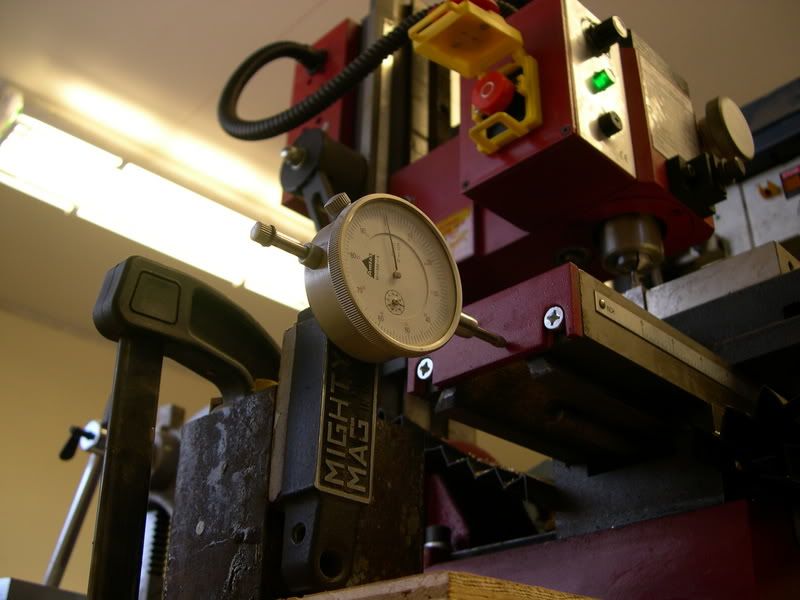
Drilling the holes for the pins.
[img]
http://i123.photobucket.com/albums/o281 … CN1355.jpg[/img]

Daily time stamp.

Image

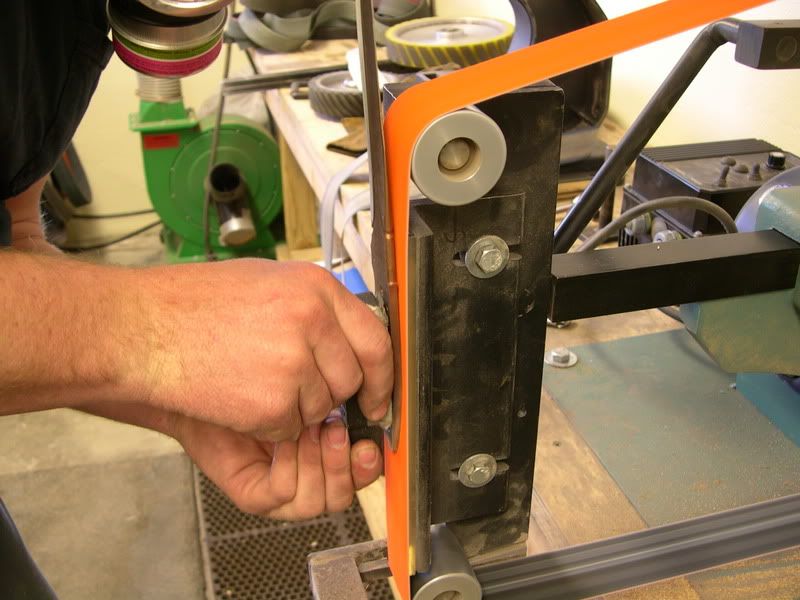
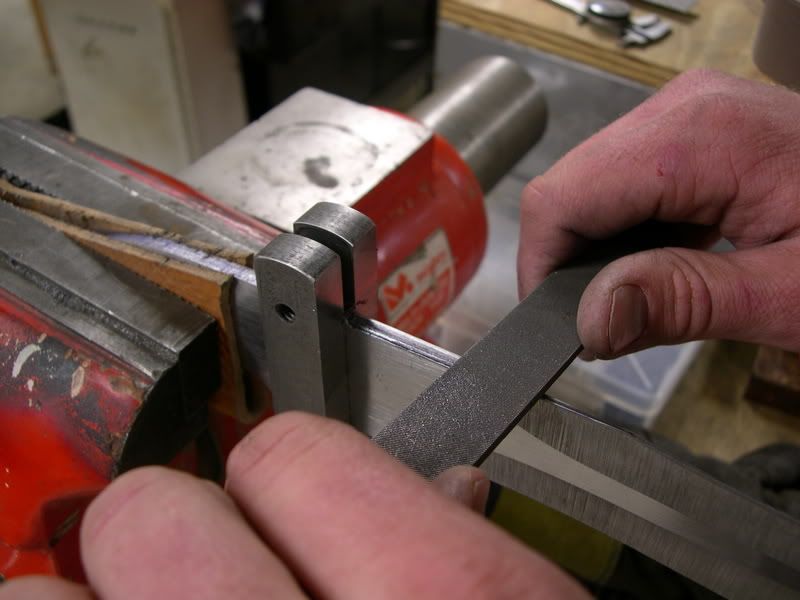
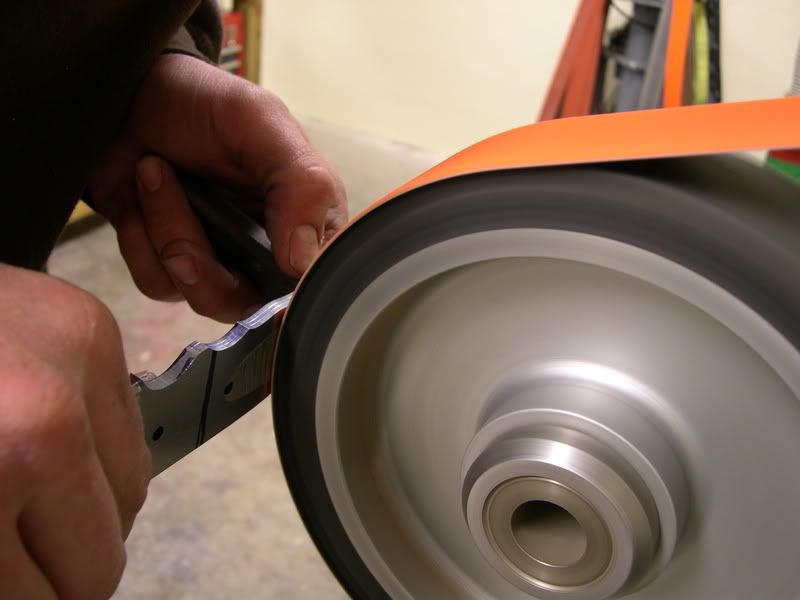
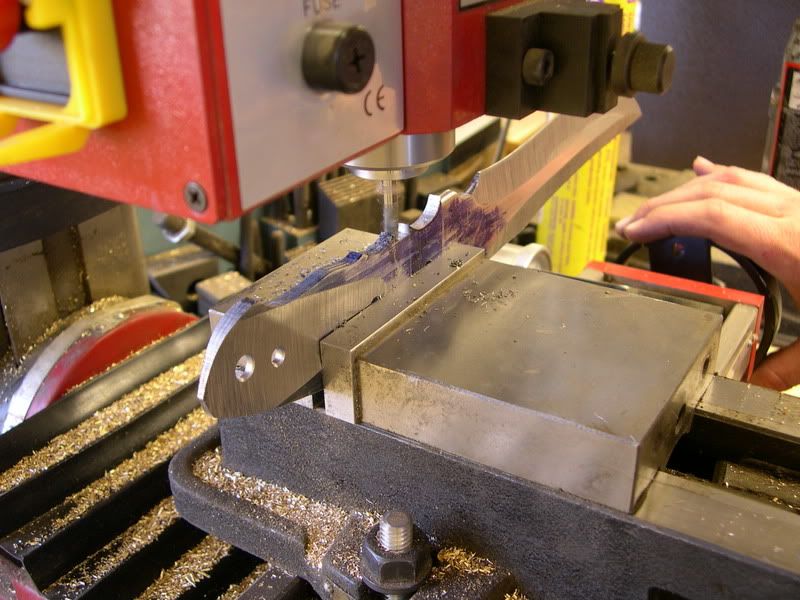
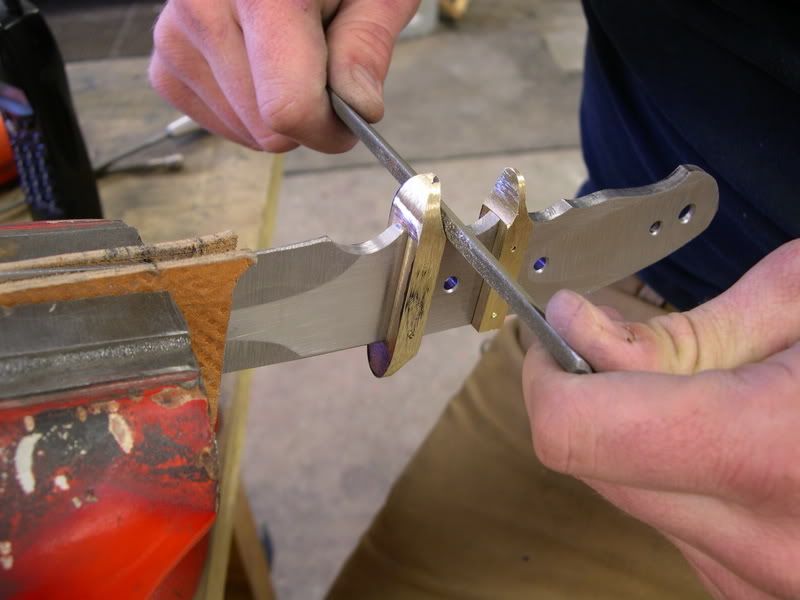
Tapering the tang, this was kind of tricky,
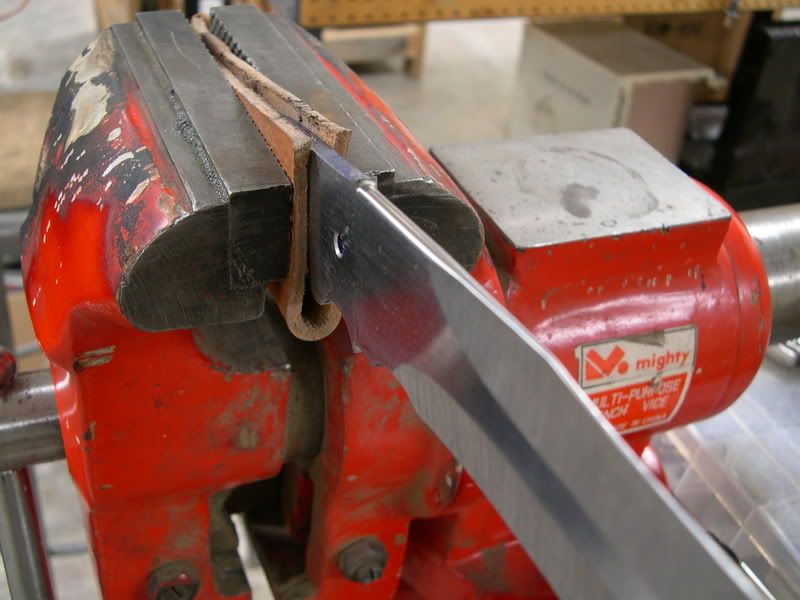
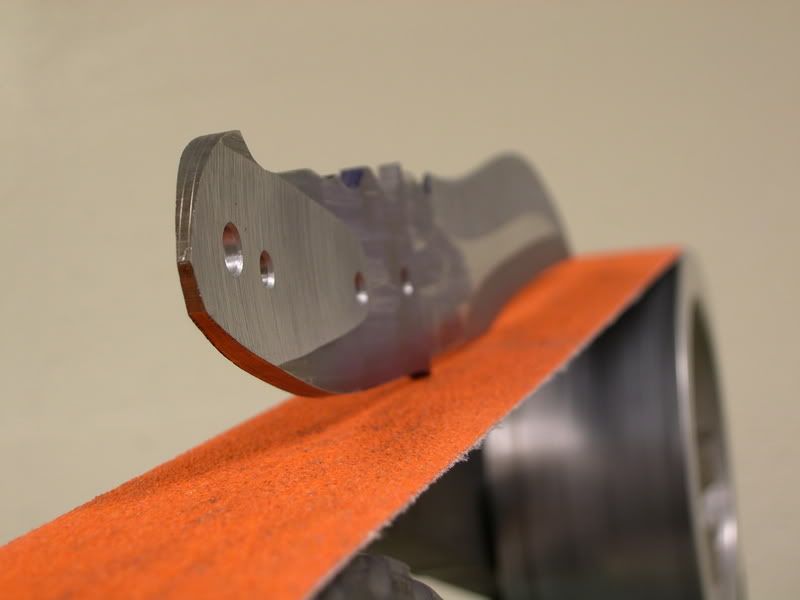
Image


The finished tang,

Image

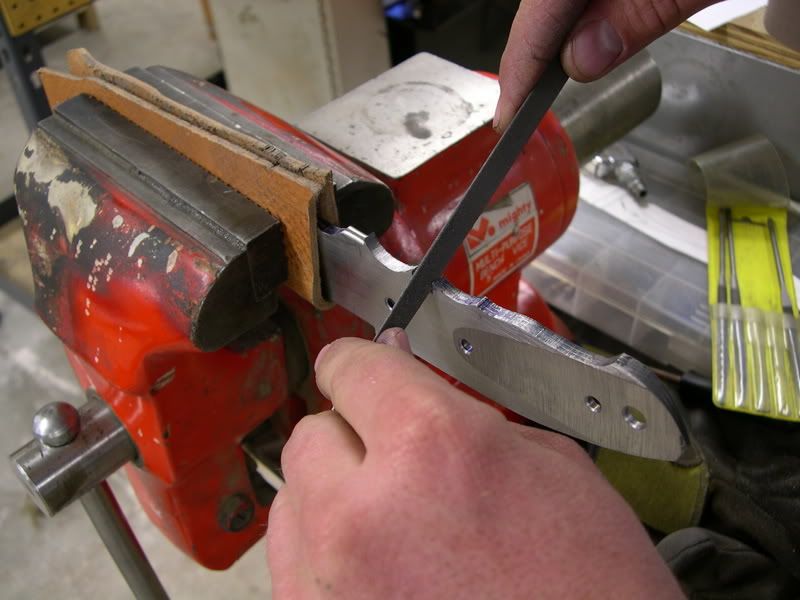
Due to the tapered tang the scales needed a to have a beveled front edge of 1deg. It doesn't sound like much but it makes a big difference.

Image

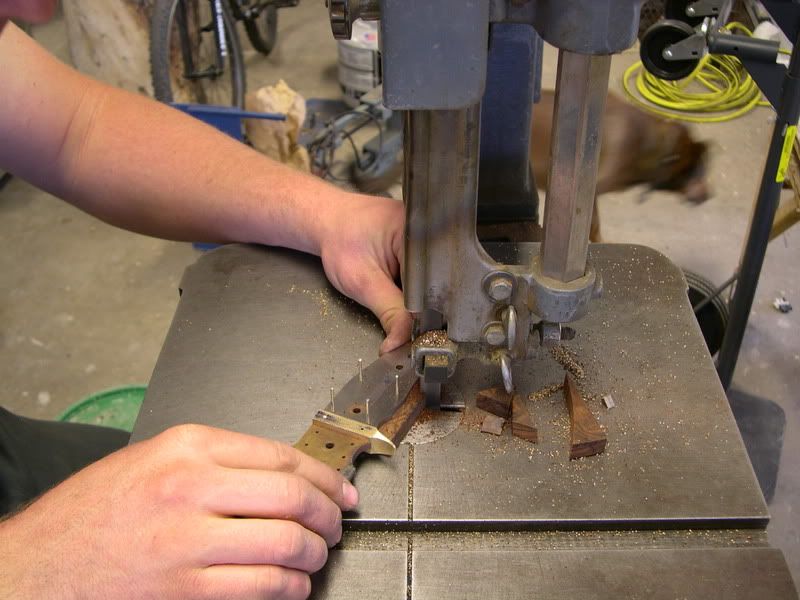
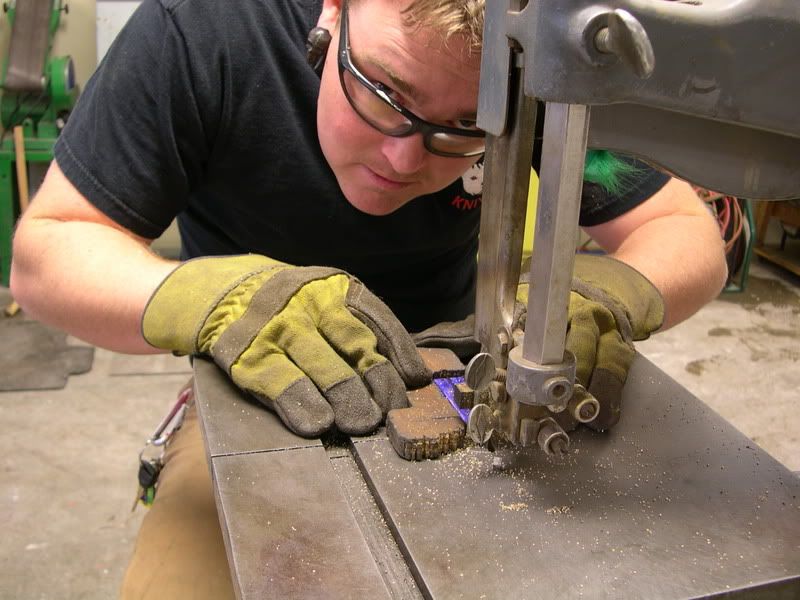
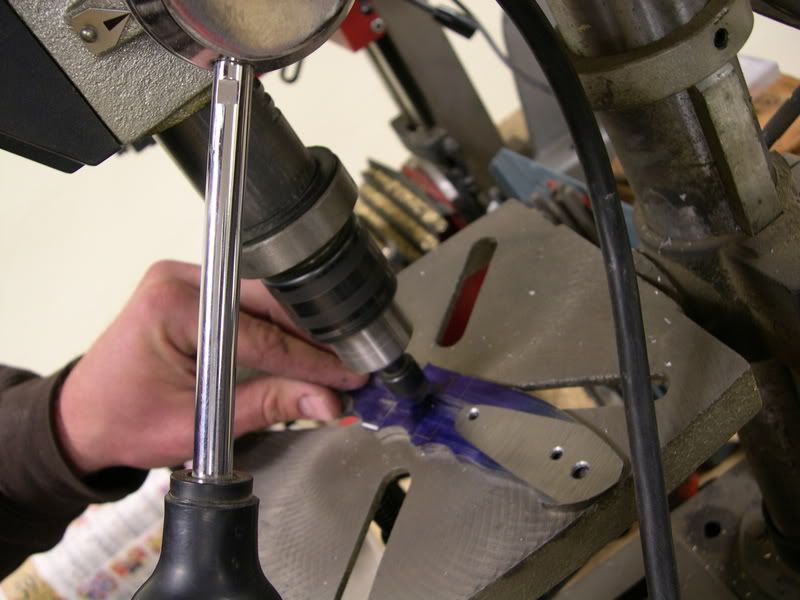
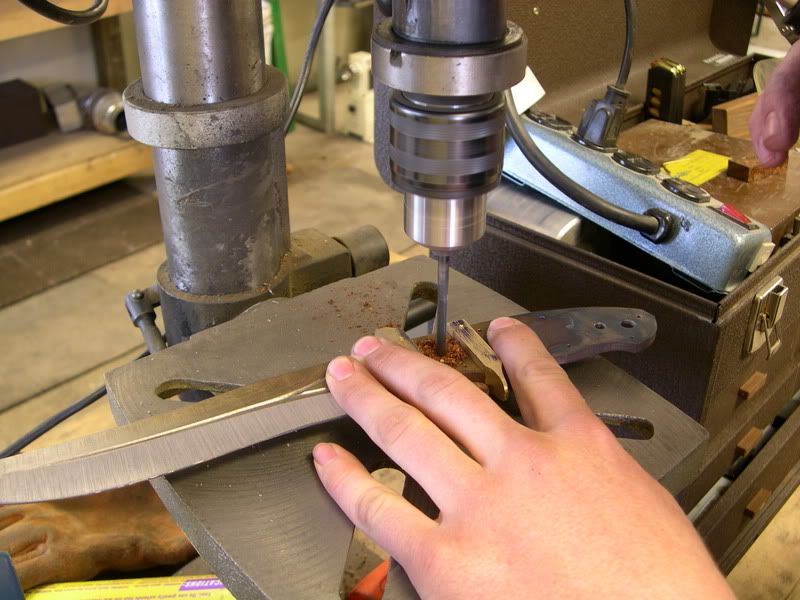
Drilling the scales,

Image

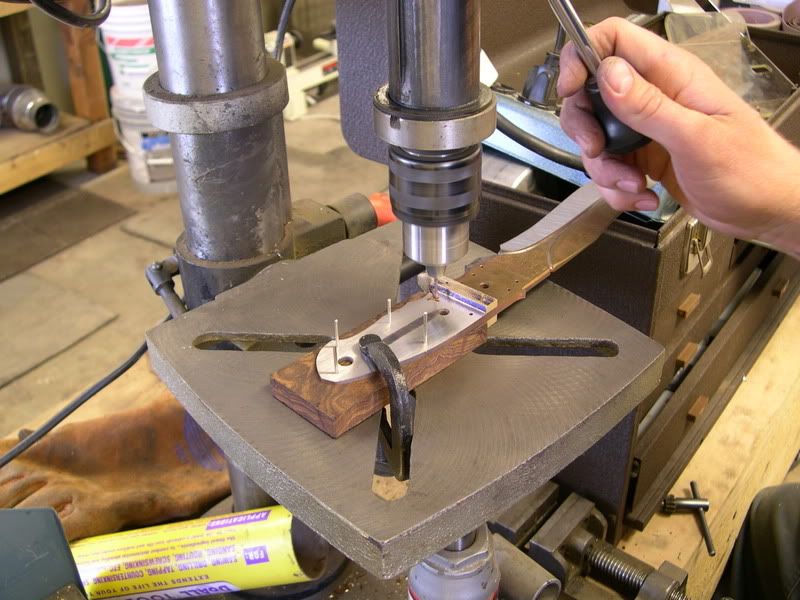
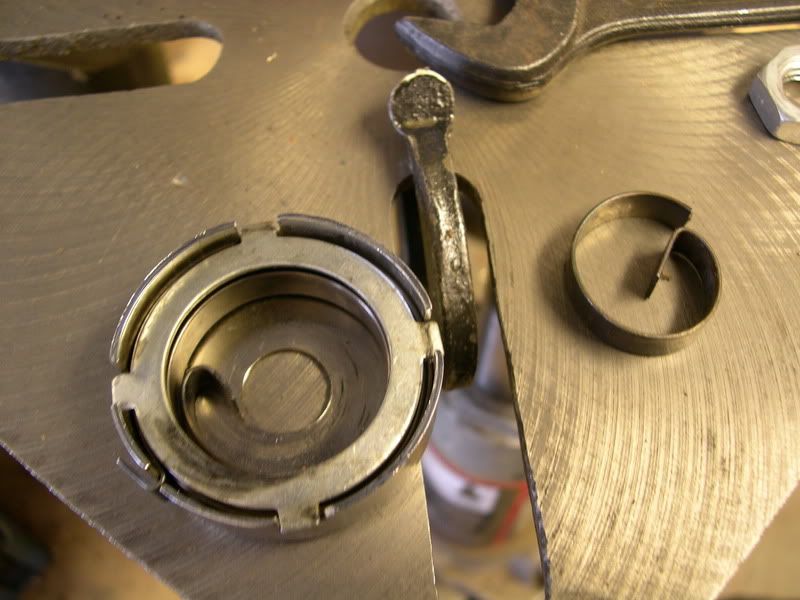
Right in the middle of a hole I heard a "CLINK" in my drill press?
Took apart return spring housing and found that a piece of a spring had broken and jammed inside the downfeed …

Image


Heating a section of spring to re-bend the catch.

Image

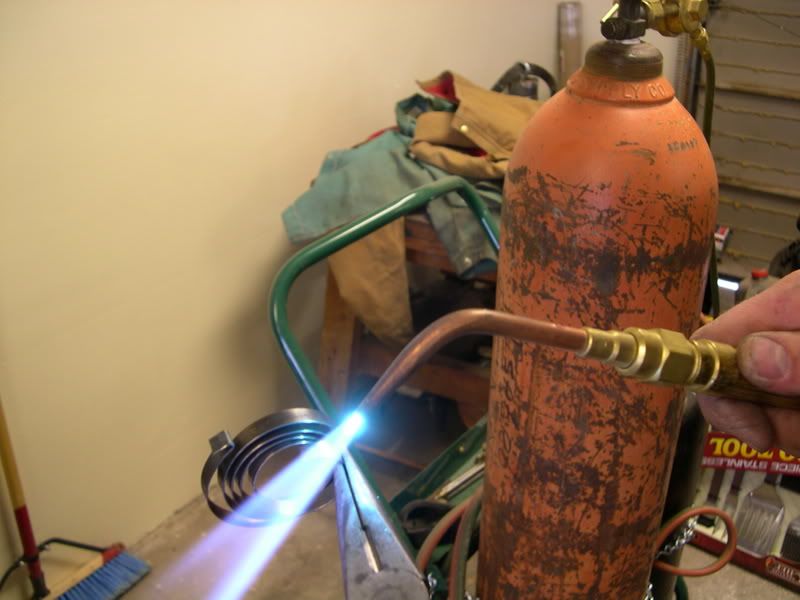
The temporarily repaired spring and the offending section.
Took me off the knife for about 30 minutes.

Image

Got the rest of the holes drilled and started roughing out the scales.

Image

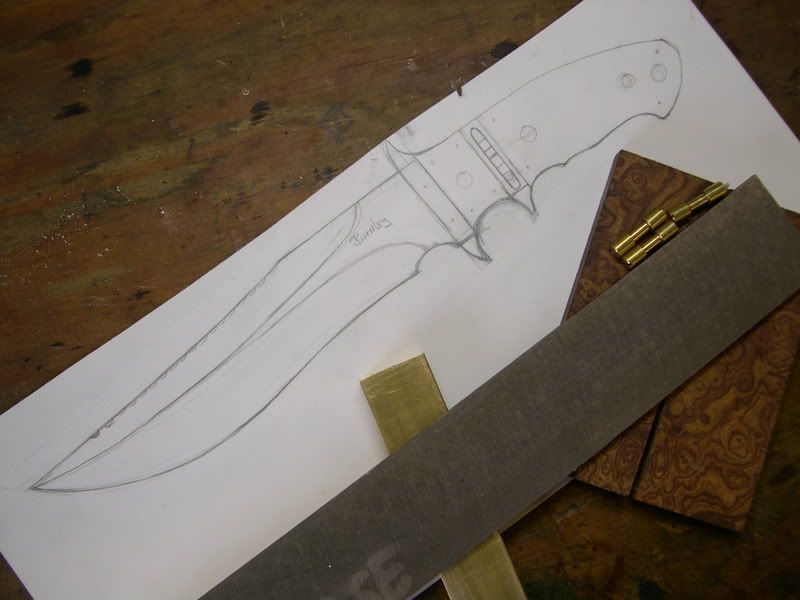
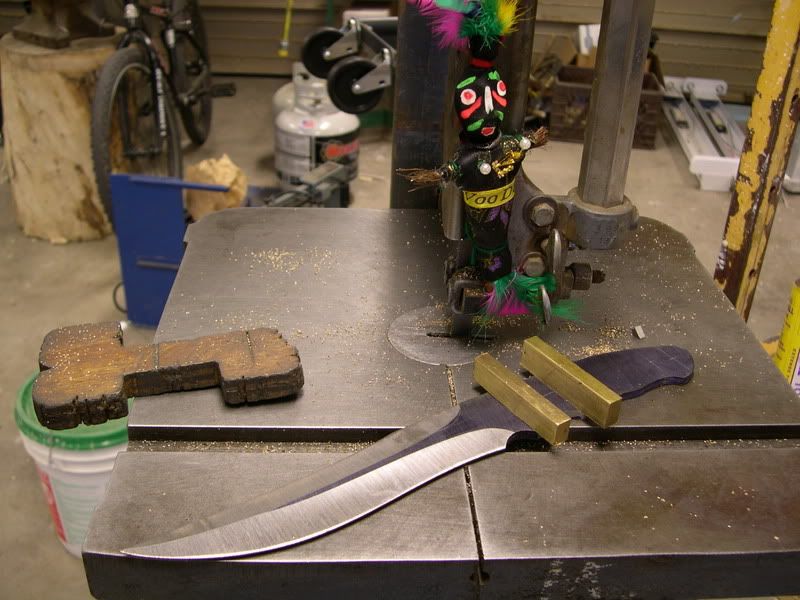
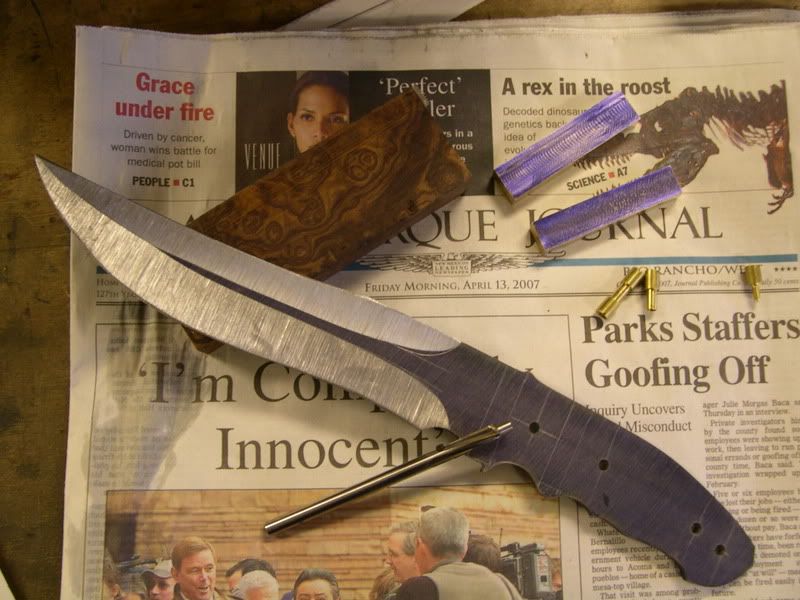
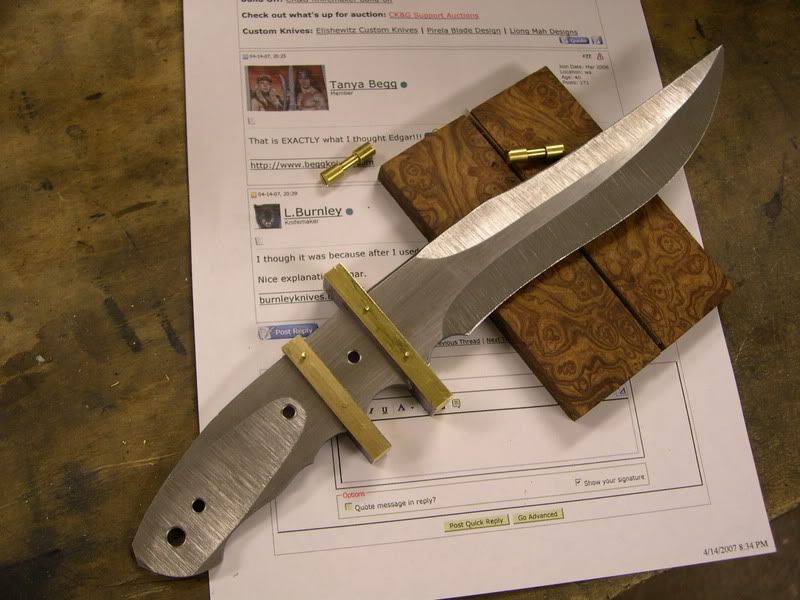
I finally have all my handle pieces made..

Image

I have to try and go find some Muriatic Acid for the etch, I'm hoping that I can get it at Home Depot, no one else has had it.
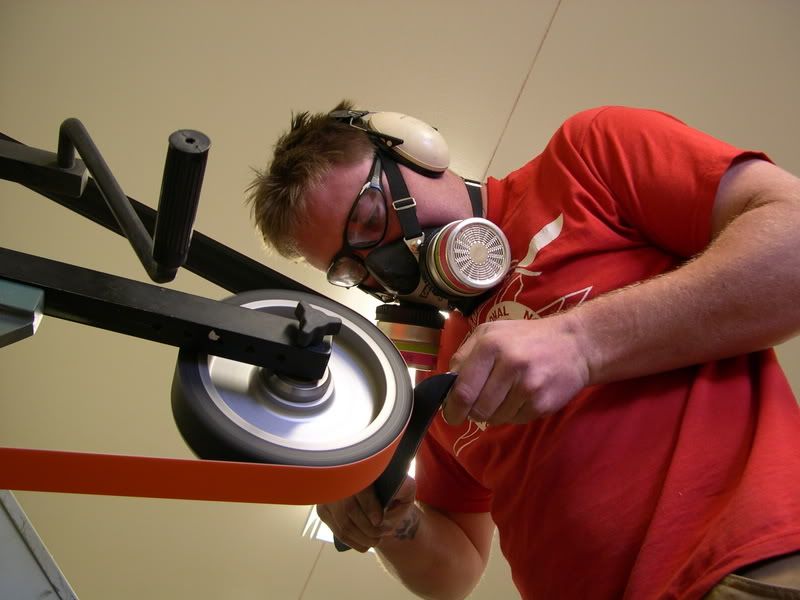
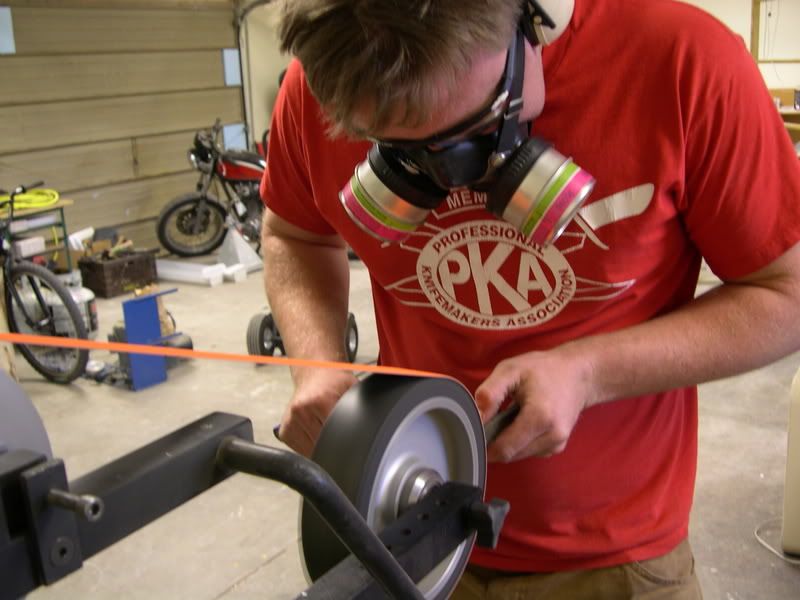
When I get back I'll finish grind the blade and start the assembly process
Dernière édition par Moonlight le 13 Mar 2008 14:48, édité 1 fois au total.
Moonlight
 
Messages: 7275
Inscrit le: 01 Nov 2006 11:07

Suivant

Retour vers Fabrication

Qui est en ligne ?

Utilisateurs parcourant actuellement ce forum : Aucun utilisateur inscrit et 10 invités